Setting Entrance parameters
To set Entrance parameters:
- Enter a name, or choose a name from the drop-down list of imported pending objects, in the 'Name' box.
- To add a Demand Line (or Lines), click the New button once for each Demand Line you need.
-
For each Demand Line:
- Double-click in the ‘Profile’ column and select from the available list.
- Double-click in the ‘Entity/Supply Type’ column and select from the available list.
- Double-click in the ‘Final Destinations’ column (optional; you can assign links manually as well). If you don't want to add a Final Destination, proceed to step 9).
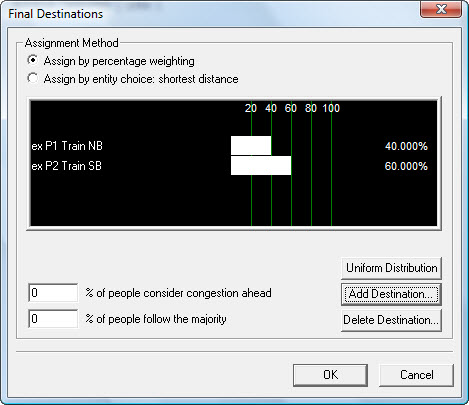
The ‘Final Destinations’ dialog box is displayed.
- Select one ‘Assignment Method’ from:
-
To add Final Destinations, click Add destination.
The Select final destinations dialog is displayed.
- Expand the object trees within the dialog box and select one or more destinations (press and hold the <Ctrl> key while clicking to select more than one).
- Click OK to add the destination(s).
- If you want to distribute Entities evenly across your destinations, click Uniform Distribution.
- Click OK to return to the main parameters tab.
-
In the Link Properties area, select one of these options:
- Do not change target
- Use final destination (Entities will proceed to wards this target or targets.)
- Specify links
If you select Specify link, click on the Links tab and add your target objects manually following the steps in Linking methods .
- Click OK to save the parameters.